

If you already know the steps and don’t want to read further, be sure to link the badge to https://www.phorest.com/salon-awards/, to show your customers and potential customers what it means for them – i.e. a guaranteed five star experience if they book an appointment at your salon!
The steps here are for a WordPress website (we’ve added steps for WordPress because it’s the most common website platform used by salons); but the process is very similar for other websites too.
Here we go!
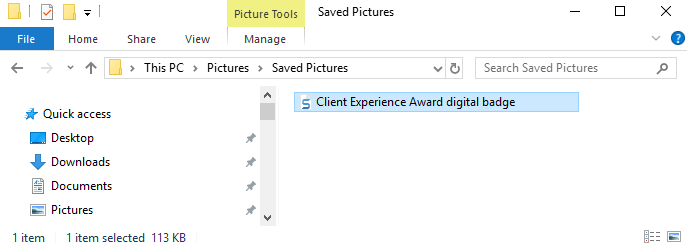
1. Save the badge (attached to the email we sent you) to your computer
2. Log into your website platform (We are using WordPress for this example)
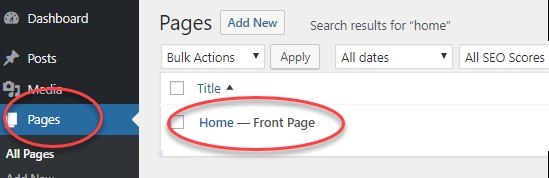
3. Go to the page you want to add the banner to – for example, the homepage
3. Go to the page you want to add the banner to – for example, the homepage
4. Place your cursor at the location within the text box where you’d like to add the badge and then press the ‘Add Media’ button
Or if you’re using the new version of WordPress you’ll need to add a new image block which might look something like this
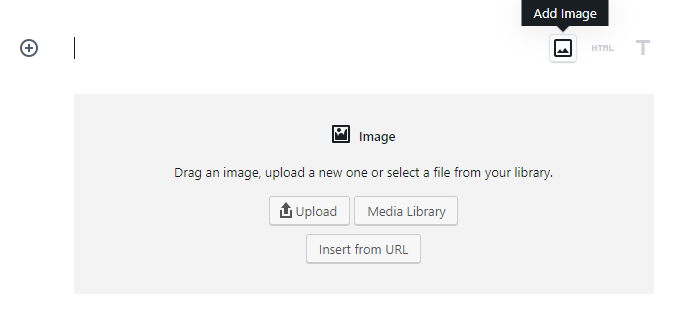
5. Click the ‘Select Files’ or ‘Upload’ button in the middle of the screen and find the badge where you saved it on your computer. Select this file and then click ‘open’.
6. Once the file uploads to your website platform, you might have the option to edit the settings for it pop up on the screen, or you may need to click to see get editing options on the right of your screen
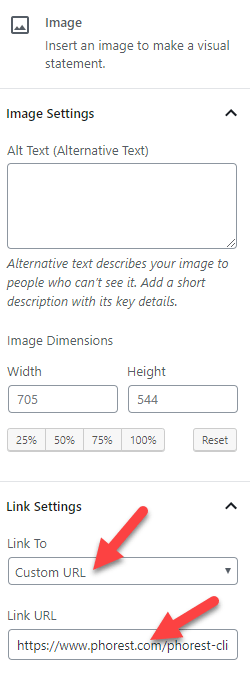
(A) In the ‘Link To’ dropdown box, select ‘Custom URL’
(B) Enter this link https://www.phorest.com/salon-awards/ in the box below. (Linking the badge to this page will show your customers and potential customers what it means for them – i.e. a guaranteed five star experience if they book an appointment at your salon!)
Then select the ‘Insert into page’ button
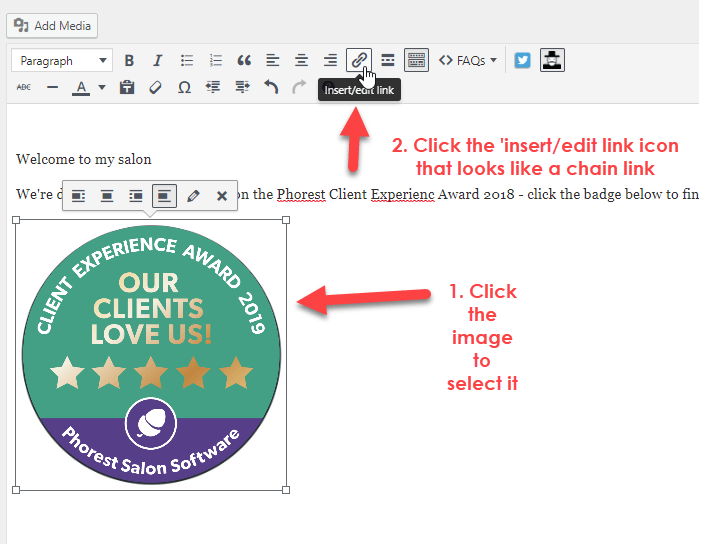
7. Alternatively (and more common on other website platforms), you may need to insert the image into the page first, and then link it.
To do that, once the image is in the content field (see below):
(A) click on it to select it, and then
(B) click the link icon in the text settings panel.
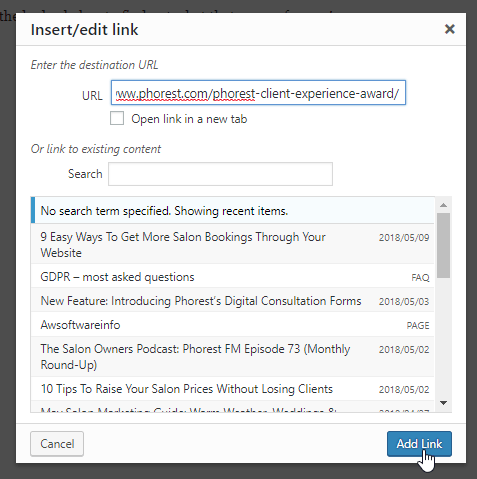
8. Then add the link https://www.phorest.com/phorest-client-experience-award/ and click ‘Add Link’.
9. Click ‘Update’ on the right-hand side of the screen to publish your changes.
And you’re done!
Once again, congratulations on your award – don’t be shy to proudly show it to all your website visitors!